Create a Base Security Role with the Absolute Minimum Privileges

2014-11-28_12h31_43

In order to configure a base security role to give a user the absolute minimal security privileges to access Dynamics CRM 2013.

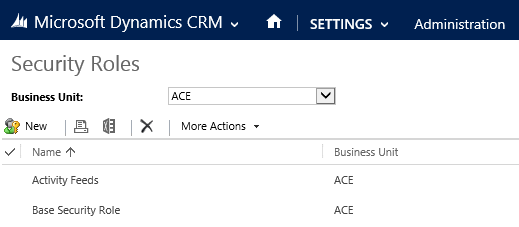
  1. In the Settings and then Administration, click the New button to create a new Security Role.
    2014-11-28_12h34_35
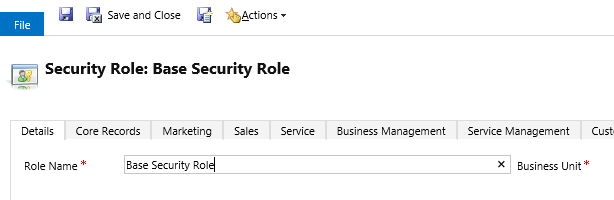
  2. In the Details tab, enter a name in the Role Name field.  I gave it the name, Base Security Role.
    2014-11-28_12h35_53
  3. In the Core Records tabs, select User/Create, Read, and Write on User Entity UI Settings.  (Note, the image has been truncated to fit.)
    2014-11-28_12h38_47.fw.bob.fw
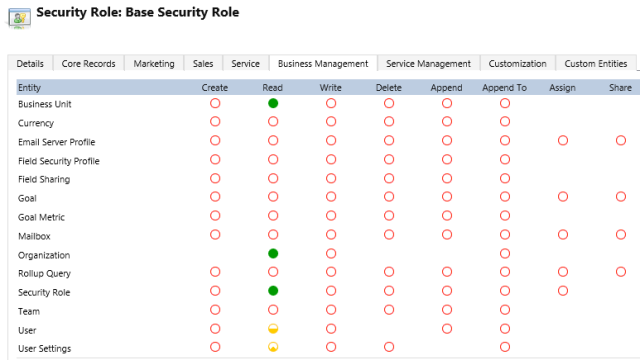
  4. In the Business Management tab, select Organization/Read on Business Unit, Organization, and Security Role.  Select Business Unit/Read on User.  Select User/Read on User Settings.
    2014-11-28_12h43_34
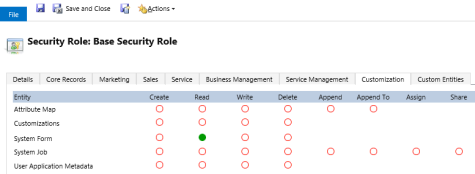
  5. In the Customization tab, select Organization/Read on System Form, View, and Web Resource.
    2014-11-28_12h49_19.fw.bob.fw

Summarize Base Security Role Permissions:

Tab Entity Create Read Write
Core Records User Entity UI Settings User User User
Business Management Business Unit Organization
Business Management Organization Organization
Business Management Security Role Organization
Business Management User Business Unit
Business Management User Settings User
Customization System Form Organization

Use the OrganizationService to Create a new Account

  1. Using the CRMServices class from the previous post, add a new Web Form.  Give it a name like Test.aspx
  2. Add a Literal control with an ID like, AccountGuideLiteral
    <form id=”form1″ runat=”server”>
    <div>
    <asp:Literal ID=”AccountGuidLiteral” runat=”server”></asp:Literal>
    </div>
    </form>
  3. In the code view should look like this:
    using CRMServices;
    using Microsoft.Xrm.Sdk;
    using System;namespace Test
    {
    public partial class Test : System.Web.UI.Page
    {
    protected void Page_Load(object sender, EventArgs e)
    {
    var service = OrgService.GetOrgService();Entity account = new Entity(“account”);
    account[“name”] = “Test Account2”;
    account[“address1_line1”] = “123 Main St.”;

    Guid accountid = service.Create(account);

    AccountGuidLiteral.Text = accountid.ToString();
    }
    }
    }

Create OrganizationService class to connect to Dynamics CRM 2013

  1. In Visual Studio 2012, create a new project, select ASP.NET Empty Web Application (4.5 Framework)
  2. Give it a name like, CRMServices
  3. Add the following References:
    – Microsoft.Crm.Sdk.Proxy
    – Microsoft.IdentityModel
    – Microsoft.Xrm.Client
    – Microsoft.Xrm.Portal
    – Microsoft.Xrm.Portal.Files
    – Microsoft.Xrm.Sdk
    – System.Data.Entity
    – System.Data.Services
    – System.Data.Services.Client
    – System.Runtime.Caching
    – System.Runtime.Serialization
    – System.ServiceModel
    – System.ServiceModel.Web
  4. Add a new Class.  Name it something like, OrgService.cs
    using Microsoft.Xrm.Client;
    using Microsoft.Xrm.Client.Services;namespace CRMServices
    {
    public class OrgService
    {
    public static OrganizationService GetOrgService()
    {
    CrmConnection crmConnection =
    CrmConnection
    .Parse(“Server=http://crm/ACME; Domain=ACME; Username=user; Password=passwd”);

    return new OrganizationService(crmConnection);
    }
    }
    }

  5. Add a new Class. Name it something like, CRMContext.cs
    using Microsoft.Xrm.Sdk;
    using System;
    using Xrm;namespace CRMServices
    {
    public class CRMContext
    {
    public static XrmServiceContext GetCRMContext()
    {

    var service = OrgService.GetOrgService();

    XrmServiceContext context = new XrmServiceContext(service);

    return context;

    }
    }
    }