The following steps will walk through the process of setting up trial versions of ADX Studio to work with Dynamics CRM 2013 online. Visual Studio 2012 and IIS will be required for this process.
- Create a trial instance of Microsoft Dynamics CRM 2013 Online. Go to http://www.microsoft.com/en-us/dynamics/crm-free-trial-overview.aspx
- Scroll down the page and click on the link, “No thanks, I’ll get started on my own”

- Complete the form. A valid email address is required.


- Create a unique user ID, CRM Online URL, and Password.

- Enter your mobile number to receive a verification code.

- Enter the verification code.

- Save this info.

- If an issue occurs while the instance is being created, go to https://portal.office.com and log in using the Office 365 user ID. Review the Service Overview and Current Health In the left-hand navigation, scroll down to the Admin section and click on the CRM link.

- When you get to the Confirm some details page select the Language and Currency. When you are ready, click on the Finish button.

- When the instance is finished creating, the You’re in! message will appear with the sign in URL.

- The new instance of Dynamics CRM 2013 should open. You should not continue until you can successfully log into CRM.

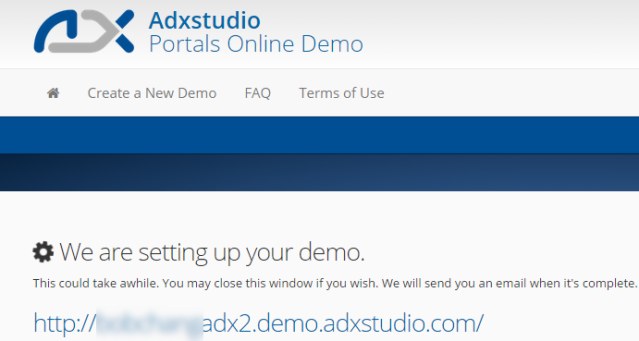
- Once you are able to successfully log into CRM, create the ADX Studio Portals Online demo. Go to, https://demo.adxstudio.com

- Sign in with an existing account or create a new one.

- Complete the registration form. Use the information from the confirmation email from Microsoft to fill in the CRM Organization URL, Username and Password


- An email will be sent once ADX Studio Portals have been installed on the Dynamics CRM 2013 Online instance. This can take an hour or longer to complete depending on how many portals you chose to install.
- In the meantime, install IIS from the Control Panel. Open Programs and Features and then click on Turn Windows features on or off in the list of link on the left.

- In the Windows Features dialog, expand Internet Information Services (IIS) and then Web Management Tools, select IIS Management Console.

- In the Windows Features dialog, scroll down and expand World Wide Web Services, than Application Development Features, select .NET Extensibility, NET, ISAPI Extensions, and ISAPI Filters.

- Once IIS has been installed, install Visual Studio 2012, you can use the Express version or if you have an MSN subscription, use any version available. If you plan on using the CRM templates from the CRM SDK, you want to consider Visual Studio 2012.
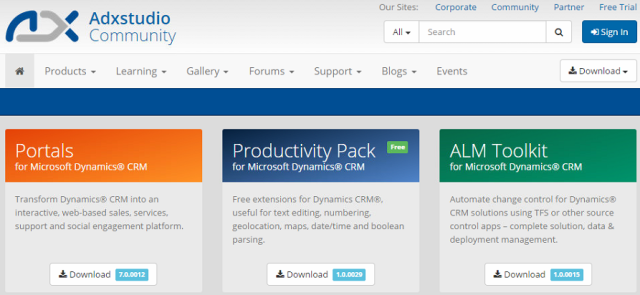
- Download ADX Studio Portals and ALM Toolkit. Go to http://community.adxstudio.com
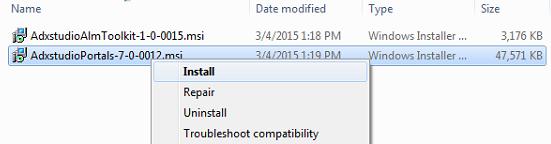
- Right-click on the file, AdxstudioAlmToolkit-1-0-<x>.msi and select Install.

- Right-click on the file, AdxstudioPortals-7-0-<x>.msi and select Install. Make of note of the installation folder. It will be needed when you configure the Website in IIS.
- In the event you get an error about missing Windows Identity Foundation, download it from http://www.microsoft.com/en-us/download/details.aspx?id=17331

- Install the Windows Identity Foundation by double-clicking on the .msu file.

- Open Visual Studio 2012 and select Open Project.

- Browse to the ADX Studio installation folder, C:\Program Files (x86)\Adxstudio\XrmPortals\7.0.0012\Samples\MasterPortal and open the file, csproj.

- When the project opens, view the Solution Explorer and edit the file, Web.config

- In the <connectionStrings> node, remove the comments and replace the ServiceUri attribute value with the URL of your Dynamics CRM 2013 online address. Also update the Username and Password attribute values to the .onmicrosoft.com User ID from Step 7 (see line 17). Note, the Web.config file is an XML format, so all tags need to be closed.

- Find the closing tag for the <portals> Right above the </portals> tag, edit the <add> node with an attribute named, websiteName and its value should be the name of one of the Portals you selected to install in Step 14. In the screenshot below, the websiteName attribute is set to “Company Portal” (see line 36).

- Save the config file and then press the F6 key to build the solution or in the File menu, open the Build menu and select Build.

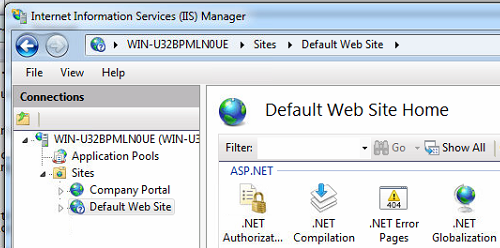
- Open Internet Information Services (IIS) from the Administrative Tools

- In IIS, expand the top connection in the left-hand tree navigation and right-click on the Sites folder to open the Sites menu, select Add Web Site.

- In the Add Web Site dialog, enter a Site Name and in the Physical path field, click on the “…” button to browse to a folder. In the Browse For Folder dialog, expand to the Program Files (x86)\Adxstudio\XrmPortals\7.0.0012\Samples. Select the MasterPortal folder and click the OK

- If you leave the port set to 80 (in the Binding section), you will receive a message about another website is using the same port, click This can be corrected in a later step.

- Confirm the ADX Studio Portals have been installed on your instance of Dynamics CRM 2013 online. Log into your instance on Dynamics CRM 2013 online. Refer to Step 8 for assistance.

- From the CRM Homepage, mouse over Microsoft Dynamics CRM in the top navigation to open the main menu and select Portals (you may need to scroll horizontally to see the Portals box).

- Confirm the Portals you selected in Step 14 are listed as Active Websites.

- Mouse over the Microsoft Dynamics CRM link in the top navigation to open main menu and select Settings.

- Mouse over the Settings in the top navigation to open the Settings menu and select Adxstudio License Keys. You will have to scroll horizontally to locate Adxstudio License Keys.

- On the Adxstudio License Key page, click on New in the page menu to create a new Active License Key.

- Complete the New Adxstudio License Key The license for the trial should have been sent in an email from ADX Studio. Check your junk mail or spam folders, otherwise, contact ADX Studio for assistance. The value in the Name field has no dependencies on the license, enter whatever you want.

- Open IIS to confirm the config and the Web site you configured in IIS are working. Click on the Default Web Site in the Sites folder. The next 3 steps are only necessary if you choose to Port 80 on the new Web site, otherwise skip to Step 46.
- In the Actions section (on the right-hand side), click on Stop under Manage Web Site.

- Click on the Company Portal or the name of the Web site you added in Step 29 in the Sites folder.

- In the Actions section, click on Start under Manage Web Site.
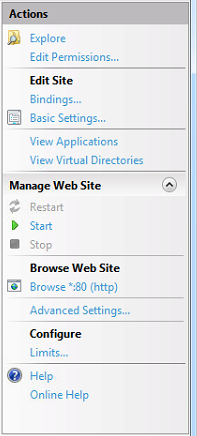
- In the Actions section, click on Browse under Browse Web Site.

- The Portal named in the Web.config should appear in the browser.

- If you receive an error message about the license, check the Adxstudio License Key and make sure the XML for the license key is saved and in its entirety. Check the Web.config and make sure the connection string (Step 28) and the websiteName value are valid (Step 29). Contact ADX Studio for assistance and confirm the license key they provided is still valid.

- Click on the Sign In button in the upper-right corner and log in using the administrator account credentials. The password was provided in the email from ADX Studio.

- Once you log in, the Profile page should appear.


